

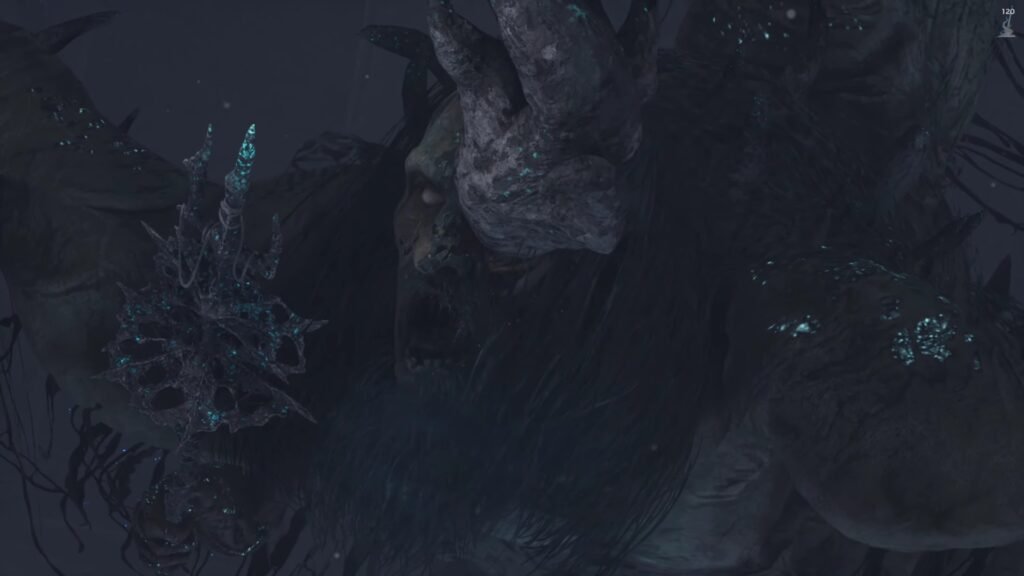
The Anguished Guardian Of The Ruins is the final boss for Chapter 3, at the very end of the Destroyed Tram Station area. In this guide, we cover all the boss movesets, and the preparation that you must do before the fight to make it a more manageable encounter. So let’s get started
The Anguished Guardian Of The Ruins Boss Fight Prep
Use one of the more heavy-hitting weapons from your arsenal, as in between attacks, you get enough time to land your hits. This way, even if you have to block a couple of concluding hits from the boss moveset, you have enough damage reduction through guard to then regain that lost health when you deal damage.
Use the Flame Grindstone, or a weapon with Fire damage. Equip the Flamberge Legion Arm, and have a few explosives ready and equipped on your belt. We want to get the burning status and the damage tick from that going on the boss as soon as we can.
The Anguished Guardian Of The Ruins Moveset
The boss has 2 phases, the second one gets activated once you deplete around half of its health. The second phase has a lot of AOE attacks, alongwith a few attacks from Phase 1 carrying over.
Phase 1 Moveset
Red Attack: Wait for the boss to slam down, the animation lasts for a couple of seconds, so don’t press dodge very early. Dish out a couple of charged attacks as soon as the move is over.
Charge & Swipe: The boss moves over you to the other side, and swipes once after that. Get a couple of good hits as it is moving, but don’t get greedy and be ready to dodge the swipe.
Swipe + Stab with Weapon: The boss swipes with the weapon once, and then does a piercing attack, then pulls the weapon back. Dodge the swipe and then move to one side, get a couple of attacks in once the moveset is over.
Slam + Swipe: The boss does an Overhead slam, followed immediately with a swipe. Again, is pretty telegraphed and avoidable, plus a great chance to land charged hits once attack is complete.
Phase 2 Moveset
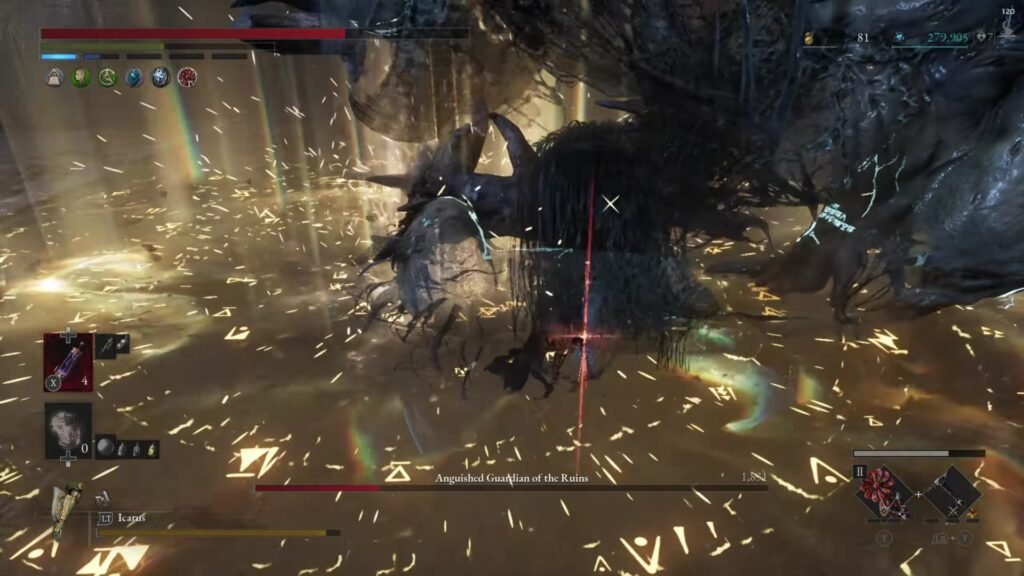
Scream + AOE attack: This is what the boss generally opens up Phase 2 with, where it screams first and then lets out a huge laser attack. This can either be a straight one, or one that swipes from left to right. It then marks an area with its newly obtained spear, which has an AOE explosion after a delay. As soon as you see the scream, run to the right and start attacking the claw.
3 Slams + AOE attack: This one also has a visual marker, where you see first that it takes a couple of steps at you and then raises itself to slam with its claw first, and then thrice with the lit spear, followed with the left to right swipe that causes an AOE explosion. All attacks are easily dodged.
AOE Spear attack: It slams the spear into the ground, marking a huge area around it which lights up and explodes after some time. Run away outside the lit area to avoid taking damage.
Quick Swipe + Lunge: It swipes with the left hand and then runs over to the other side. Dodge or block.
Red Attack + Slam: Sometimes, it does the red attack Slam followed by another one. This move also gives you enough time to prepare, you can avoid both attacks and then throw out some of your own damage.
If you follow the above reactions to the boss’s moveset, you will have the fire tick going within the first couple of attacks, and a much easier time defeating it. Feel free to throw explosives, or unload Flamberge instead of attacking with your weapon wherever mentioned above, or alternatively use that time window to repair your weapon to 100%.
Anguished Guaridan Of The Ruins Rewards
You get the Tortured Guardian’s Ergo on defeating the boss, which can be exchanged for:
- Pale Knight: A Greatsword that scales with Motivity(B) and Technique(C)
- Nightmare’s Amulet: Increases attack power once that specific status debuff gets applied to the enemy
You also unlock the Anguished Guardian trophy to add to your collection from the 11 possible trophies to obtain in the Lies Of P DLC.